 MooMetric.com Integrating marketing and business metrics using code and non code solutions.
Related Articles

Contents
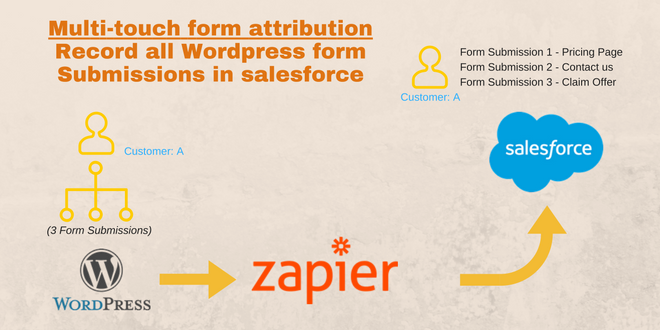
This has been a problem that we’ve been plagued with for sometime. How can we get our form submission data from WordPress into Salesforce without using a custom coded solution, or otherwise known as Salesforce Web-to-Any. We’re also not just talking about the first form submission, but every form submission a customer has made (multi-touch attribution style).
At the moment the only multi-touch solutions appear to be things such as DaddyAnalytics, Kissmetrics, Hubspot, Marketo and Pardot. All of these solutions are expensive and not also so simple to implement.
Extended reading: Part 2 of how to use contact form data inside salesforce
Using CFDB Plugin and Zapier we are able to pull in all our form submission data direct into a Salesforce custom object which is then linked to a Contact or Lead. Provided you had another unique field it could also be related to any number of other custom objects.
While this guide is made specifically for people using WordPress and Salesforce, provided you are storing all your existing form submission data in an accessible online location (SQL, CSV, other), you can still use Zapier to import your form data direct into a Salesforce custom object.
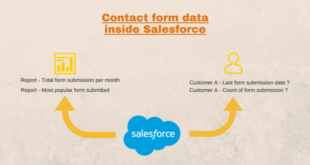
Example of a contact inside Salesforce and all their related form submissions stored in a custom object.

Implementation time: 2 hours
Pre-requisites:
- CFDB Plugin installed
- Salesforce Sales Cloud
- Zapier subscription
Prepare CFDB JSON query
Clean up contact form fields
If you only have one contact form on your WordPress website, then you can skip this step. However, if you have multiple forms, it is suggested to start standardizing those forms to use the same field names.
i.e – if you are using Contact Form 7 and have fields such as emailaddress, email-address, your-email, email-773 make all of these the same (maybe email) on all your contact forms so the data columns will match up when exporting data across all your forms.
Prepare the JSON export query
CFDB comes with an easy to use export tool – all you need to do is select the fields you want to export and you can access that JSON data from any application on the web.
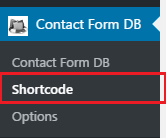
- Open up the CFDB shortcode builder.
- On the forms tab scroll to the bottom and select *All Forms*. Optionally just select the forms you wish to export.
- Add in your fields that you want to eventually be shown in your Salesforce custom object. Make sure that at least one of those fields is unique to a Contact/Lead/Custom object that you’re going to later map. In most cases this will be the email field as email addresses are already unique and rarely change. If users login to your website, this could also be some other form of ID attribute that matches that same person in Salesforce.
- Zapier requires an ID, so we use the submit_time field that is unique to each form submission. In the screenshot below you will see an example of how this should look and that the table headers will map submit_time to ID for our unique identifier
- Columns to display: Submitted,submit_time,Page Title,Page URL,name,email,phone,
- Table Headers: submit_time=id
- Make sure the export type is JSON and then test out your export by click the URL. Also save a copy of this URL for later.

NOTE: Optionally you can update other settings such as limiting the number of rows you wish to export. Because Zapier will poll ever 15 minutes, a maximum number of 20 rows would be safe for most organizations, unless of course you think there are times where you will be receiving more than 20 form submissions in a 15 minute period.
Your JSON output should look something like this. You will notice the id is actually the UNIX output time-stamp of the form submission.
|
1 2 3 4 5 |
[ {"id":"1475852833.6922","Submitted":"2016-10-07 15:07:13 +00:00", "phone":"555-666-777","Page Title":"Some random blog post"} ] |
Prepare the new Salesforce Object
Create a new object
You can call your new Salesforce Custom Object whatever you like. For this example we will create an object called Online Actions. This way we can possibly use the same object for other online actions that we want to record (example: Subscribes/unsubscribes).
- Navigate in Salesforce to Setup > Create > Object
- Click “Create Custom Object”
- Name your object and finalize any additional settings (we suggest using an Auto-number for the record names)

Create a new record type
As mentioned above, you might want to use the custom object for other types of online actions your visitors/customers preform. So for this we will create a record type called Form Submissions.
- Navigate to Setup > Create > Objects > Online Actions (the object you just created)
- Scroll down to the bottom of the object page where is says “Record Types” and click on “New”
- Enter the name of your record type as Form Submissions (or whatever you desire)
- Once you’re done click on save to return back to the object.

Create the fields
For this example you can see we are using the name, email and phone as fields in our JSON export. This of course is not limited. Depending on your form fields you have in your JSON CFDB query, you can create a number of fields.
- On the same Online Actions record, select “New”, to create a new field. The screenshot below should help guide the field types.
Required Fields:
- UID (this will map to the id of the form submission in your JSON output)
- Submitted Time
- Related to Contact/Lead/Other
Optional Fields:
- Name
- Phone
- Page Title
- Any other fields in your JSON query
Make sure that your UID/Unique ID field is set to unique – this will help prevent duplicates if you need to import old data.

Once you have prepared the custom object in Salesforce, you’re ready to move onto the next step.
Join the data using Zapier
Zapier is free for a 14 day trial if you want to just test and play with this implementation, after that it’s $20 per month for 3000 zaps – if you have less than 3000 form submissions on your website each month, then this is an extremely cheap solution. Not to mention all the other cool things you can do later with Zaper :).
If you haven’t already, make sure that Salesforce is connected to Zapier. This can be done through the settings menu inside Zapier and takes about 10 seconds to complete.
Create the Trigger
- Get started and select “Create Zap”
- For the trigger search for and select “Webhook” > Retrieve Poll > Save+continue
- Enter the JSON url you saved from the first step of this tutorial into the URL field
- While the id should be auto detected, for safe measure, put in “id” to the “Key” field.
- Click continue and run the test to fetch the JSON URL. If successful, you should now be able to move on and map


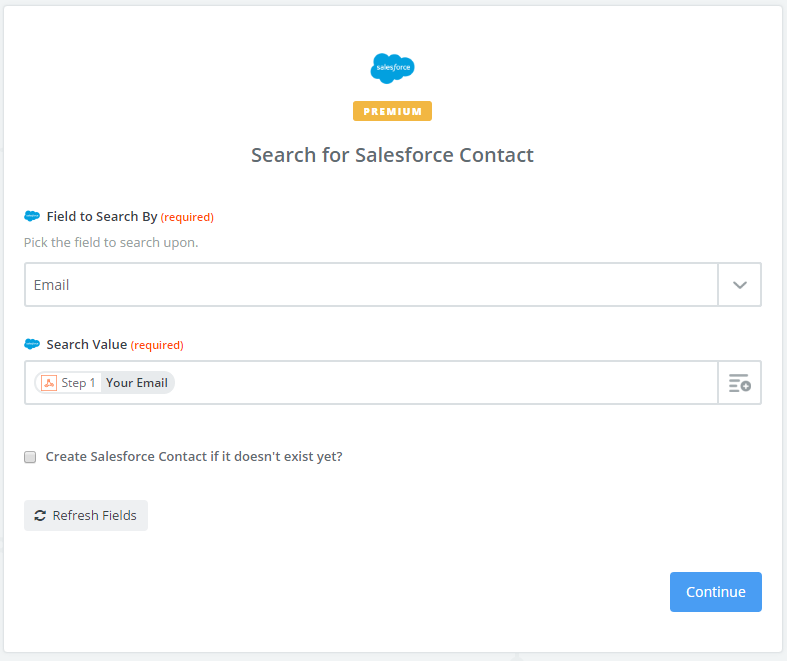
Create a Search Step
You want it so the new record your creating actually relates to something. For this we add in a search step to look up an email address and related it to a contact. Of course you can also use a Lead or another object which you want to relate the form submission to.
- Hit the “+” sign to add in a “Search Step”.
- Select Salesforce once again as the object and scroll the “Search for Salesforce Contact”
- Enter your search field – in our case it is the email address
- Hit continue and complete. Optionally you can also create the lead/contact if the record doesn’t exist yet.
Create the Action
Following on from the first step, your JSON feed should now be reachable by Zapier and able to successfully pull data out of the feed. Now we need to map that data to our Online Actions object in Salesforce.
- Select Salesforce as the Action > Create custom Object > Continue
- Search for and select the Online Actions Object. Once selected, the fields from your object should populate in Zapier.
- Find and map the corresponding fields (i.e: UID in Salesforce = JSON id field).
- Make sure that you’re “Related Contact” field is using the ID from the previous search step


The final completed Zap should look something like this.

Extra remarks
What about existing records in CFDB?
- Zapier will only sync new records which appear in your JSON feed, so if you have thousands of past form submissions which you have recorded in your CFDB you will find that they don’t all sync to Salesforce. The best work around for this is to export your current data to XLSX, clean it up, save it as CSV and use a dataloader (skyvia.com is my favorite) to import existing records.
What if my related object doesn’t exist in Salesforce?
- There are often times where Zapier beats whatever method you have of syncing new Leads/Contacts into Salesforce, in which case the related object doesn’t exist yet. One work around is to use process builder again but in reverse. When a new contact is created, run a flow that is executed by Process Builder to lookup any Online Actions which match the email (or other unique field) to that contact and then run an update on the Online Actions.
I don’t use WordPress, what can i do?
- Zapier has a lot of ways to pull in data. Provided you are recording ALL of your form submissions in a central location and those form submissions have some sort of ID, it is possible to pull the data in using Zapier and the same method as above less the part about CFDB for WordPress.
What other form variables can i pass?
- If you’re a company that has many different forms on many different pages, you might want to also create some “hidden fields” with default variables that are always passed on the form. For some of our customers this has been the Language of the form, Name of the form and the url it was submitted from. From this basic data we can see more than just a form was submitted, but dig deeper into the types of forms a person was submitting (was it on the pricing page? was it on a particular blog post? etc.).
Recording other online actions using Zapier
- While form submissions are a very key and important point to someones online activities, there might be other indications which are also useful. Zapier can be used to receive webhooks from other applications – Example: Sendgrid, when an email bounces, flag that lead as dead in Salesforce. If someone subscribes/unsubscribes from a Mailchimp campaign, update their mailing status within Salesforce.
Concluding
This is all very cool stuff. You can look at any contact and see exactly what form submission actions they have preformed over the entire lifetime of that customer. While this might not be as applicable to eCommerce websites, it is certainly useful for anyone that sells a service and makes use of many different forms to engage their customers.
With the data in Salesforce, you can easily generate some basic reports on how frequently someone submitted a form, or even build your own very lite lead scoring module based on the form data which has been submitted.
Let us know how this article has helped you and leave a comment below!
Great writing with explanation !! By using this we can know the history of a specific customer I mean what kind of form he/she submitted over time. I am sharing one other article with you from here you can know about salesforce form building without any coding.
Thanks Again